Wednesday, August 1, 2012

Quick and Easy Family Quiche


Once a week I purge my fridge and usually refuse to buy anything else until the leftovers are eaten !! The Frugal Scotswoman hails !! haha
But quite honestly, the best family dinners I seem to make, are those made with all that is left in the fridge from previous meals. I usually make some kind of sauce or stir-fry to combine the ingredients, but last night I decided to make an old favourite standby of mine....good old Quiche ! It's like breakfast and dinner rolled into one. I had some crispy bacon, which my husband has a passion for every morning....I think he thinks the birds are also coming for breakfast....always makes too much ! He is the breakfast Guru...and more power to him, that's all I'm saying...I'm not the breakfast kinda gal shall we say ?!
So we had a delicious, summery kind of dinner with Broccoli, Bacon and Sharp Cheddar Cheese Quiche, a 'to die for' salad [everything else left over] and a special request from my daughter....Chicken Noodle Soup, from a can !! AHHHGGG. Yes, I do serve and love the old standby, we all drink it up without a care ! This is a real home, where canned goods are part of our make-up, and there is no pretending that I stand at the stove boiling chickens, chopping veggies and counting calories as I do so !!


That said, I'm sure you are here for the Quiche Recipe, so here it is....

Broccoli, Bacon and Sharp Cheddar Cheese Quiche

I make my own pastry because it's really so darned easy and tastes a million times better than a store bought pastry shell.....and who has too many of them lying around ?? Hmm

You will need a 9 inch [approx] deep dish pie dish, I use a Pyrex glass dish

Pastry Shell

Ingredients

8 oz All-Purpose Flour
2 oz Butter [I use Unsalted all the time, I find Salted too 'salty', I like to add my own salt]
2 oz Shortening 
Cold Water to bind [a couple of tablespoons at most]
Pinch of Salt

Directions

Sieve flour and salt.
Rub in butter and shortening with COOL fingers to a sandy texture.
Make a well in the center.
Add sufficient water, a tablespoon at a time, to make a fairly firm paste.
Keep refrigerated until use.


Now comes the fun part !!
I prefer to mold my pastry into the pie dish by hand....most recipes will tell you to roll the pastry out on a floured board, then roll it on to your pie dish. I have found that you end up having to fill in cracks with your fingers anyhow, so why not mold it by hand in the first place and cut out the washing up !
I made the shell in the morning and refrigerated it....this is important !!
 No matter how COOL your hands are, the pastry must be firm when you add the filling !! No-one likes a soggy Quiche !

Filling

6 Eggs
1 Cup Milk
Salt and Pepper to taste
Broccoli - cooked, approx 1 large handful
Bacon, cooked, 3 Strips, snipped with kitchen scissors, small pieces
1 Cup Sharp Cheddar Cheese, grated

Method

Whisk the eggs, milk, salt and pepper in a bowl.
Scatter the broccoli, bacon and cheese evenly over the pie crust.
Pour the egg mixture over the filling.
Bake in a 375 degree oven for 35/40 minutes or until the center is set.

Notes :

  • You can use Heavy Cream in place of the milk to make a richer filling, but as I said, this was a 'use up leftover's' dinner....I don't have Heavy Cream lurking in my fridge without a name on it !!
  • Everyone's portions are different, so if you have more filling, just pour your egg mixture carefully, not to overflowing....horrible smell from the oven ! If you have some egg mixture left over, make yourself a quick pick-me-up omelette, I won't tell !
  • Of-course, go ahead and use whatever you have at hand for your Quiche, the base egg mixture will still work for you.
  • Also, some people like to pre-bake their pie shell to ensure a crispy crust throughout. You can do that of-course, but for me, it would have defeated the purpose of the family dinner....too much time spent in the kitchen....mine turned out just fine and the family loved it !

Pin It!

Sunday, July 29, 2012

Mini Queen of Tarts or Wee Jam Tarts


When I was young, there seemed to always be something in the fridge that was home-baked and sweet. These wee jam tarts were one of my favourites ! Mum usually made a batch of pastry, and made a variety of lovely little cakes and tarts......we were sooo lucky !!

I had some of the pastry left over from my Ecclefechan Butter Tart, it freezes great by the way ! 
These wee gems are made in mini muffin pans. The pastry is so deliciously crisp, crumbly and not too sweet, then filled with your favourite jam....I used Strawberry which I had at hand. These tarts are also amazing when filled with Lemon Curd !
Such a simple little treat which is great with a nice cup of tea !


Mini Queen of Tarts or Wee Jam Tarts

I had about 1/4 of the Pastry Recipe left over from my Ecclefechan Butter Tart which gave me enough to make one dozen mini Tarts.
It's great to make a whole batch of this pastry and split it into 2 to 4 portions. Wrap the pastry in cling wrap then a baggie and freeze for up to three months. Just take a batch out of the freezer when needed and defrost it in the refrigerator. 
Line mini muffin pans with about a walnut sized piece of dough, then fill with approx 1 teaspoon of your favourite jam. 
Bake in a 375 degree oven for 25 minutes. 
Allow tarts to cool slightly before removing them from the pans then transfer to a cooling rack.

Pastry Crust [Pate Sucree] 

Ingredients :

2 1/2 cups All-Purpose Flour
3 tablespoons Sugar
1 cup[2 sticks] unsalted Butter, chilled and cut into small pieces
2 large Egg yolks
1/4 cup ice Water
[I always add a pinch of salt to my pastry, it just seems to heighten the rich flavour]

Directions :

In the bowl of a food processor, combine the flour and sugar. Add butter and process until mixture resembles course meal. 10 to 20 seconds.
In a small bowl, lightly beat egg yolks, add ice water. With machine running, add the egg mixture in a steady stream through the feed tube. Pulse until dough holds together without being wet or sticky; be careful not to process more than 30 seconds.
To test, squeeze a small amount together; if it is crumbly, add more ice water, a tablespoon at a time.
Wrap in plastic and refrigerate until ready for use.

NOTE : Pastry can easily be made by hand - working very quickly, rub butter into flour until it resembles course meal. Make a well in the center, add the beaten eggs and ice water, quickly bring the dough together with your hands. Wrap dough in plastic wrap and refrigerate until use.

Now how about putting the kettle on for a nice wee cup of tea !!

Pin It!

Monday, July 23, 2012

Chef Mary's Favourite Sandwich


This sandwich evolved several years ago during an extremely hungry afternoon ! I was in a hurry and just grabbed a few ingredients, stacked them on wheat bread and baked the sandwich in the oven. It was so good I made it several times after that, and friends loved it so much, that I decided to put in on the menu at our family Pub/Restaurant. 
But what to call it ??
It consists of thinly sliced Smoked Turkey Breast, Fresh Spinach Leaves, Avocado, Monterey Jack Cheese and my Parmesan Garlic Buttermilk Dressing. All of these scrumptious ingredients were then stacked between two slices of toasted wheat bread, then baked in the oven till all the gooiness was warm and dripping with melted cheese !
The hard part was coming up with a name ! If it was going on the menu, I had to call it something. I didn't want to just single out a couple of ingredients though, as all of them married together so deliciously !
It was one of our wait staff who eventually stated 'Why don't you just call it Chef Mary's Favourite Sandwich ?' 
And so a new sandwich was born, and became one of our most requested items on the menu !


Chef Mary's Favourite Sandwich

Ingredients

2 slices of Wheat Bread, toasted
2 oz Smoked Turkey Breast, sliced thinly [or more if you like....I don't like thick sandwiches where the corners of your mouth crack due to having to open your mouth so wide !]
1/4 Avocado, sliced
Fresh Spinach, small handful
Monterey Jack Cheese, enough to cover the above ingredients [or again...more if you like !]
Parmesan Garlic Buttermilk Dressing, to spread on both sides of wheat toast

Directions

Toast 2 slices of Wheat Bread [ you don't want soggy bread]
Spread Dressing on both sides
Stack Spinach, Smoked Turkey Breast and Avocado on one side
 Top with Monterey Jack Cheese
Place other side of sandwich on top
Put on baking tray and heat in the oven, approx 375 degrees, until cheese is melted and sandwich is warmed through.
If you have a Panini Press [which I don't....Santa wishlist], the sandwich could also be cooked on this.


So there you have it ! I do hope you enjoy this delicious sandwich !

Pin It!

Friday, July 20, 2012

Parmesan Garlic Buttermilk Dressing and Dip


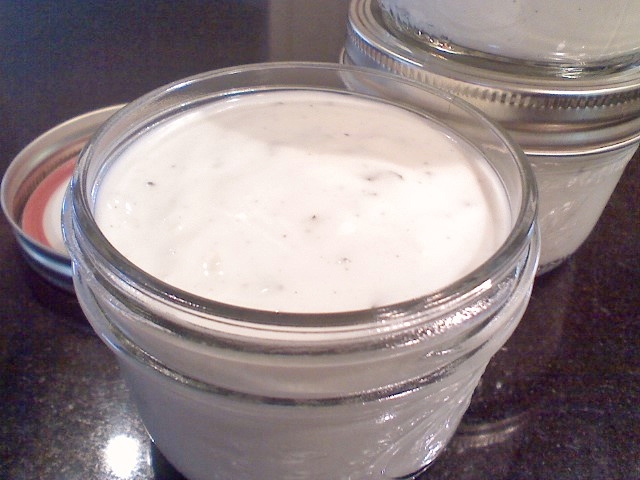
This creamy fresh homemade dressing/dip was one of the favorites in my family restaurant. It is also the base  for a sandwich that was a 'best seller' which I will be sharing soon. 


Tonight I drizzled it over a slice of  Heart of Romaine, fresh baby spinach, white corn and a freshly picked English cucumber. I also had some Alfalfa sprouts which I always enjoy garnishing with due to its airy, grass-like appearance....it also tastes divine.
This is also a fabulous dip !! I add some extra Parmesan Cheese when I use it this way.


Parmesan Garlic Buttermilk Dressing/Dip

This makes approx 4 cups of dressing 

Ingredients

1 1/4 cups Buttermilk
2 cups Mayonnaise
1 tbsp Cider Vinegar
1/4 cup Chopped Fresh Parsley
1/2 cup Grated Parmesan Cheese [not the powdered concoction sold for spaghetti please !]
1 tbsp Minced Fresh Garlic

Directions

How easy is this....Mix all ingredients in a bowl using a whisk to combine !!
Refrigerate for at least one hour, longer is preferred, to allow all the flavours to infuse.


I hope you enjoy using this dressing in all sorts of ways....on salads, sandwiches, as a dip !
Pin It!

Wednesday, July 18, 2012

Mum's Walnut Gateau with Wartime Cream


My Mum was the best baker in the world ! I know of-course that everyone's Mum is the best baker, but really....my Mum was !!
We took her sweet delights so much for granted, but I was blessed to follow in her foot steps with her love for baking, and the ability to re-create her unique recipes from her hand written notes which are my prized possession today.
Mum made this Walnut Gateau frequently, and she would bake several at a time for Church functions....they never made it to the bake table as people would stop by and put orders in at the house, so they were always sold before the function even took place !!
The sponge is a very easy Victoria Sandwich Cake recipe and the cream is an old World War 11 recipe when Heavy Cream was not available among other things, due to Rationing during the War years. Mum simply named it 'Cream for Cakes' and she used it in abundance in various desserts which she made throughout my childhood. It is made with Cornflour [cornstarch], milk, butter[margarine in those days], sugar and Vanilla Essence[extract].


This recipe has never been shared before outside of my family, and in fact, I am the only family member who has ever made this cake with Mum's Cream. The last time was approx 18 years ago in our family restaurant.
Mum passed away 2 years ago at the grand age of 94 !! I had always thought that I would never make the cake again, and I certainly would NEVER share her recipes. But you know....the world was so much sweeter with her here, and I feel that now I have the opportunity to share her sweetness with the world in this small way ! She would want that....not for her recipe books to become dust covered memories. I think she would be very proud today that I am carrying on with all the fine lessons she taught me. I can't imagine what she would think of my blog....too 'high tech' !
So Mum, this is a Celebration and Tribute to you....I made the cake for my sister, Frances's Birthday !


Walnut Gateau Recipe

Sponge Ingredients

6oz Butter, room temperature
6oz Sugar
6oz Self-Rising Flour
3 large Eggs

Directions

Grease and line 2x 8 inch baking pans with parchment paper.
Cream together the butter and sugar until light in colour.
Add eggs one at a time, lightly beating until incorporated.
Add flour gradually, beating with each addition until combined.
Divide mixture between the two pans, spreading out evenly. [For a level sponge, spread mixture slightly away from the center].
Bake in 350 degree oven for 20-25 minutes until golden and toothpick poked in center comes out clean.
Remove from oven and allow to sit in pans for 5 minutes to shrink slightly from sides.
Transfer to cooling rack, peeling off parchment and allow to cool completely before frosting.

Here are some visuals and how to line a pan with parchment paper.
My pride and joy....Kitchen Aid Stand Mixer in Pistachio [waited for 1 year to get this colour !]


Beat the sugar and butter


Add the eggs one at a time....[the second one slipped in for the photo!]


Fold in the flour.
Grease 2x baking pans..

Cut out 2 circles of parchment paper and cut strips at least tall enough to come above pan sides. When you cut out the circles, you should have enough excess to cut strips. Fold approx 1/4 inch of strips and snip diagonal cuts as you see here. 


Place strips around inside of pans, overlapping to cover area. Strips should fit snugly when you spread the cut fold around the base.

Place circle of cut parchment on top. Smooth paper to fit.


Divide mixture between 2 pans


Spread mixture slightly away from center which will result in a more level cake once baked


Pretty.....leave cake in pan for 5 minutes to shrink slightly away from pan


Turn out pan onto cooling rack and peel away parchment paper


Leave cake to cool completely


Meanwhile make Mum's Cream......

Mum's Cream for Cakes

Ingredients

1 1/2 cups Milk
2 tablespoons Cornstarch
2 oz Sugar
3 oz Butter [unsalted]
Vanilla Extract [2 to 3 drops] 

Directions

Pour milk into small pot, reserving a couple of tablespoons.
Mix reserved milk with cornstarch to form a loose cream.
Place pot on stove and warm milk to scalding point [you should see bubbles form on the surface] DO NOT BOIL.
Pull pot from stove and slowly pour cornstarch mixture into pot whisking ALL THE TIME to avoid lumps.
Return pot to stove, continue to stir constantly, bring to just bubbling, then pull back off stove.
Transfer mixture to container, cover and chill, occasionally giving a good whisk so that a skin does not form, and mix is creamy.
Meanwhile, beat sugar and butter until pale in colour.
When cornstarch mix is cool, remove from fridge and beat into butter and sugar until all mixture is blended.
Add Vanilla Extract, beat to incorporate.
The mixture looks kind of grainy.....this is how it should be ! Remember - this is War-time Cream, a substitute for Heavy Cream in those days.....tastes delicious and sweet !
Refrigerate till ready to use.  


Cornstarch mixture in pot
Cream all blended together in bowl


Cake Assembly

Additional Ingredients

2 cups Chopped Walnuts
A few Glace Cherries for Garnish
1/2 cup fruit juice to soak [I use juice from canned pineapples]
Sugar Glaze - 2 cups Powdered Sugar mixed with approx 2 tablespoons water to form thick icing for top of cake.

Directions for Assembly

Slice through both cakes to give 4 layers
Spread 3/4 of Mum's Cream between layers, finishing with the bottom of one cake facing upwards [nice and flat]
Poke a few holes through the cake with a skewer, then slowly pour fruit juice over top of cake to soak. 
Pour Sugar Glaze over top of cake, spreading carefully to edges.
Spread rest of Mum's Cream around the outside of cake.
Cover outside of cake with chopped Walnuts.
Garnish top with Glace Cherries.
Refrigerate to set cake for about one hour.

Slice cakes to give 4 layers

Spread Mum's Cream between layers leaving 1/4 mixture for sides


VOILA !!! 
HAPPY BIRTHDAY FRANCES !!!
Hope everybody enjoys one of our Mum's Special Creations, it's been so much fun to share !


Pin It!

Monday, July 16, 2012

Ecclefechan Butter Tart

Ecclefechan Butter Tart


I will never forget the first time I baked this Scottish Tart in my family restaurant, many years ago. If memory serves me well, we were having a full Scottish menu to celebrate St Andrew's Day or was it a Burn's Supper ? Anyhow, we had the wait staff come in a wee bit early so that I could familiarize them with the special menu for the evening. 
They were a great bunch of kids, so hard working, and earned every tip that was left. One girl in particular though, who was a family friend and was always kidding around, just couldn't quite get her tongue round the Scottish words on the menu that night. She wrote them down and taped them to her tray, and paced up and down in the kitchen reciting them to herself before dinner started.
 Then the time came for her to go out to the dining room to serve her first table. It was a table of four 'mature' ladies who were very gracious in their attention to her descriptions, until she got to the Ecclefechan Butter Tart......the looks of horror on their faces will remain in my memory as one of the funniest sights I've seen !' Ekel-fek-an ' is the pronunciation, so try to say Ecclefechan Butter Tart fast if you are not familiar with it and see what comes out......haha !! What these ladies heard was a bit of course swearing with the 'f's and 't's mixed up !!
 Needless to say, they all had a good laugh when it was explained to them, and they left her one of the biggest tips she ever got for her hard work !


Ecclefechan is a small village in Dumfries and Galloway, Scotland. It is the birthplace in 1795 of Thomas Carlysle, the famous philosopher and historian.

The 'Arched House' where he spent his childhood, remains much as it did then, maintained by The National Trust for Scotland. You can read more about this little village here


Ecclefechan Butter Tart is a sweet, rich, dried fruit and walnut flan. For the pastry crust, I use a classic Pate Sucree.


Ecclefechan Butter Tart Recipe

Pastry Crust [Pate Sucree] 

Ingredients :

2 1/2 cups All-Purpose Flour
3 tablespoons Sugar
1 cup[2 sticks] unsalted Butter, chilled and cut into small pieces
2 large Egg yolks
1/4 cup ice Water
[I always add a pinch of salt to my pastry, it just seems to heighten the rich flavour]

Directions :

In the bowl of a food processor, combine the flour and sugar. Add butter and process until mixture resembles course meal. 10 to 20 seconds.
In a small bowl, lightly beat egg yolks, add ice water. With machine running, add the egg mixture in a steady stream through the feed tube. Pulse until dough holds together without being wet or sticky; be careful not to process more than 30 seconds.
To test, squeeze a small amount together; if it is crumbly, add more ice water, a tablespoon at a time.
Wrap in plastic and refrigerate until ready for use.

NOTE : Pastry can easily be made by hand - working very quickly, rub butter into flour until it resembles course meal. Make a well in the center, add the beaten eggs and ice water, quickly bring the dough together with your hands. Wrap dough in plastic wrap and refrigerate until use.

Filling

6oz Brown Sugar
4oz Melted Butter
2 Eggs
4 teaspoons Wine Vinegar
2 cups Mixed Dried Fruit [I used : Apricots, Prunes, Cranberries, Pineapple] Roughly chopped
2oz Chopped Walnuts

Directions :

Preheat oven at 375 degrees F.
Take pastry dough from fridge and allow to sit at room temperature just long enough to be pliable by hand.
Line a flan ring [10 to 12 inch] with the pastry dough [I used 3/4 of the above pastry recipe, keeping the 1/4 for another use]
Mix fruit and walnuts together and add to pastry case.
Whisk together the eggs, brown sugar, melted butter and vinegar.
Pour this mixture over the fruit and nuts.
Bake for 30 minutes.


Serve warm or cold with some lightly whipped sweet cream. Enjoy !!


Pin It!